We're talking about HAIR!!!
Oh friends, I hate my hair! I've hated it all my life!
It has a mind of its own and it's ridiculous!
You don't believe me, do you? No one ever does. Whenever I say that I hear, "But you have beautiful hair!"
Well, you think that because I style it! If it's ever "beautiful" it's because I've earned it! It's naturally unattractive.
This is how I usually do my hair:
(Selfies are so weird... *eye roll*)
My hair is a pain because it's naturally curly in spots, naturally wavy in other spots, and overall a frizzy mess. When it's humid, the above style is a lot of work for a very mediocre result, so I do something different in the summertime. Today's post will be both hairstyles.
I'm going to start with my summertime style. It's quick and easy, which I love, but it's not a real polished look.
As always, I'll insert my disclaimer... You'll never know that I used to be a hairstylist. Please don't expect anything fancy or professional. Remember, I'm a homeschool mom now! Haha!
To start, I attach my diffuser to my blow dryer:
Next, I blow dry some product in. I use two things, a root lifter and a mousse:
My root lifter is the Uplifting Foam by Aquage. I need something that is going to literally lift the hair away from the scalp, so that is why I use this. And a general purpose mousse, (sometimes I use a volumizing mousse, this one is a curl defining mousse) for the mid-shaft through to the ends.
When I started having my babies, I became a nighttime shower-er. It was too tricky to shower in the mornings with babies and toddlers all over the place. (At least it felt like babies and toddlers were all over the place.) So I would shower at night before bed because the kids would be asleep and Micah would be home to listen for them while I was in the bathroom.
I still do this! So by morning, my hair is almost dry. I do not blow dry starting with completely wet hair. To do this on a regular basis would fry the hair! When I'm applying my products to blow dry, my hair is about 80% dry. The goal is to just blow dry the products in.
I apply the Aquage right to the scalp using a rat-tail comb to carve out parts:
I rub it into the scalp. Once that's applied I distribute the mousse throughout my hair and comb it through.
Girls, I'm sorry, these are not the best pictures! I know you can go on You-Tube and watch entertaining and well-done tutorials about hair and makeup, and as you have figured out, that's not what I do!!! Me and technology don't mix! I was snapping these pictures with my phone while getting ready in my teeny-tiny little bathroom! Remember, I'm a regular person and this is a real-life blog!!!
When blow drying for curly hair using a diffuser, set your blow dryer on high heat and low speed!
Just to show you the difference two products and a diffuser can make, this is my hair before I began:
And my hair after:
Now once I reach this point, I'm never satisfied, and I feel like it still needs a little work:
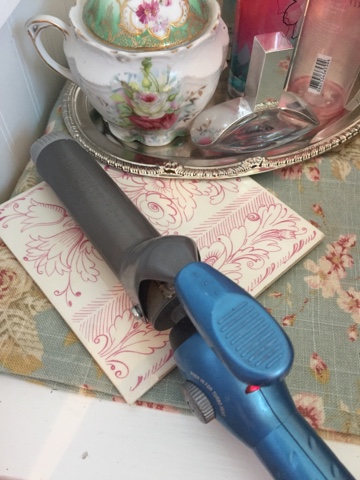
So I plug in a one-inch iron:
And grab a few random spots to touch up on:
My friend and stylist told me once to twist the hair just a little bit before applying the iron. Can you tell in the picture above that I've twisted the strand? It was a great tip that she gave me and I still do it!
I just touch up a few spots with my iron, spray my hair with hairspray, and this is the result:
Most of the time, though, I style my hair with hot rollers. I love doing my hair this way because I have thick hair, so it takes me forever to go through it with just a curling iron, alone. Another reason I love hot rollers is because I can get more volume than with just a curling iron.
I use the same products that I showed you before, but I blow dry these in without the diffuser attached:
(My seven year-old, Roman, is helping me with the pictures :):):)
I like to use the type of rollers that come with medal clips, not plastic clips. My experience with the plastic clips is that it leaves dents in the hair. The medal ones do not.
When I made the decision several years ago to use hot rollers on a regular basis, the hard rollers and the medal clips would give me a splitting headache! If you are not accustomed to hot rollers, but would like to start, be aware that it could give you headaches in the beginning. Don't let it discourage you! I would take an ibuprofen or two to get me through it. I've noticed now, though, that I don't have to take anything anymore because my scalp has toughened up to it. You'll adjust to it, too.
This is now just a part of my life. I'll show you what I do...
I'm not saying this is the right way or the only way, it's just my way... I start in the crown, and carve out a section right behind the bang section:
While I was doing this, Roman asked me why I wanted him to take these pictures, so I told him that it was for my friends who read my blog. I said, "Some of them wanted to know how I fix my hair." And he said, "Why? You look like a unicorn!" I laughed!!! But I thought, Sheesh! Thanks a lot! (Kids sure keep you humble, don't they? Haha!)
Ok, I'm about to tell you some important stuff so pay attention!
First!... I hairspray each section, individually, before putting the roller in. So many people make the mistake of styling their hair and then spraying it at the end. But by then it's too late. The style won't hold. Hairspray needs to be layered in:
Next!... I pull each section that I'm working on forward. I try to envision that the section at the scalp is the base and when I roll the curler down, I want it to sit right on its base. Like this:
Ta da:
I continue doing this, repeating the above method, down the mohawk section...
Carve out a section, spray! spray! spray! Pull forward, roll the curler down to the scalp, and clip in.
Now, we need to talk about the sides! I use my finger to carve out a vertical part from the edge of the roller to the top of my ear:
Listen to me! Do not roll this section downward or toward your face. You will not like the result! (Don't ask me how I know that! Haha.) Instead, this section gets pulled forward and rolled back, away from the face.
Ok, I want to tell you a couple of things here...
-The larger the section, the looser the curl.
-The longer you leave the rollers in, the tighter it will set.
-I leave the bang and nape sections out.
I try to leave my rollers in for at least 15 minutes, but I've been known to leave them in for as much as an hour! I notice that the result is better if I can leave them in longer. While my hair is setting I do other things. On this day that I was taking these pictures, I was getting ready to take my kids to the park, then to McDonald's to eat, and then to church for their evening bible class. So, once my hair reached this point, I touched up my makeup, got dressed, and plugged in a 1 1/4 inch curling iron.
I start in the nape, spray, and curl:
Then I begin to remove the rollers, starting with the bottom ones first. The bottom ones first! This is important, work your way up! Again, I'm thinking about layers and working in sections. I'll take out two or three at a time and evaluate to see if there are any spots that need touching up with the iron.
This is how I curl my hair with an iron. I do not clamp the iron down onto the ends and roll up. NO! Don't do that! I start in the middle of the hair first, leaving the ends out. Then I slowly click the and turn the iron to include the rest of the strand. I tried to snap a picture of this for you, but it was tricky! Haha.
(By this point, Roman was long gone. He had had enough! ... Men! ...*eye roll*)
I keep removing rollers and curling with the curling iron:
At the end, I flip my head over to shake the curls out and spray more hairspray! (I'm pretty sure that when I die, it'll be from hairspray inhalation. And I'm still trying to figure out if that'll be worth it...)
This is my result:
The other side:
Sometimes I leave it down like this and other times I like to clip back the bang section:
Roman's back and willing to take a picture! Yay! I'm ready! We're off to the park:
Well friends, I've told you everything I know! But as always, you are welcome to leave any questions you may have in the comments below! (Hey! That rhymes!)
Love to you all, and Happy Hairstyling!
~ Courtney


